We're
now into our final year before heading out on our adventure. We still
have a few items to get for the boat and we've set up a budget to manage
this. One thing we 'll need is a water maker. We had picked one out
at the Boat Show last year made by Spectra. It makes something like 8
gallons per hour, runs almost silently, is totally automatic and costs
around $6,600. This sounded almost affordable at the time but as we get
closer to our departure date we're beginning to narrow down our needs.
We decided that 8gph just wasn't enough for our lifestyle, that we
really needed 2 to 4 times that. We don't want to be running this thing
all day and night and that's really the kicker. Living aboard at the
marina we routinely go through 250 gallons per week or 35.5 gallons per
day. That's pretty wasteful for most live-aboards but over the last
four years that's been average for us. We're OK with that.
When
we're out cruising we most likely won't be making water while at anchor
in a busy harbor. A lot of people just pump their crud overboard and
the water in a harbor can be pretty filthy which would clog up our
filters pretty quickly. If we can get by on a full tank of water for a
week while at anchor then we could just refill it while we're underway.
The issue then is that we'll need to make more than 8 gph. Spectra
makes larger water makers but the price goes up quickly. For a 16 gph
unit we're looking at about $12,000 which puts it cleanly out of our
reach.

Because of this and the fact that I enjoy making
stuff I started looking around for some Do-It-Yourself info. On the
internet you can find anything and sure enough, I found two really
excellent articles on how to build your own water maker. One uses a
high pressure pump from an industrial pressure washer (Cat 247 at left) and makes 40 gph.
The entire system can be done for under $3,000. Now we're talking!
The only concern is how much noise does this thing make? Our neighbor
down the dock has a water maker and you can hear it from a mile away. I
couldn't bear that and would be willing to pay a bit more for something
quieter. The second system is more automated using sensors and relays
to protect the system when the pre-filters get loaded. This second
system also runs with a pressure washer pump but has several suggestions
for alternatives, all costing more money but providing less noise and
less maintenance. With the cost of a better pump this system can be had
for less than $4500.


I think I'll combine ideas from
the two systems. We already have a thru-hull and basket type strainer
that's currently used only for the deck washdown system. I think I can
safely tie into that just beyond the strainer and not have to run the
two systems at the same time. From there we'll run a line to a feed
pump that provides low pressure flow to keep water going into the high
pressure pump. We're going to use a magnetic drive pump here that'll be
virtually maintenance free. It's a Blueline 70D (yellow pump at left) and runs at 12 psi and
4 gpm. This will feed into two pleated synthetic pre-filters, a 20
micron and then a 5 micron. From there it runs into the high pressure
pump for which we'll either use a Cat #247 or a Hydra-cell D10 (center photo). The Cat
is a pressure washer pump that runs at 1200 psi and 3.6 gpm. It's
biggest drawback is that it's noisy and introduces vibration into the
system. The vibration can be taken care of but the noise is another
matter. Right now I have an RFQ (request for quote) into Hydra-cell.
Their pump is used in industry for moving all types of fluids and the
beauty of it is that it has no seals and it's operation is simple so
it's basically maintenance free. And noise free. The same design is used for water-makers on nuclear submarines. They gotta be quiet! If we can afford it
this is the pump we'll be using. The pump output runs into the reverse
osmosis membranes (drawing at left) and pressure vessels. To get 40 gph we'll have to use
two of these, each being 2.5" x 40". There are two outlets from each
pressure vessel. One will feed into a pressure regulation valve which
will keep back pressure at 800 psi which is necessary for the whole
reverse osmosis thing to work. This is also the brine water or concentrate that gets dumped overboard. The other outlet is the product water and will feed through a
flow meter and then dump into our water tank.

That's
the basic description of the system. It's actually more involved
because we're going to have pressure switches at the output of the
pre-filters that will give a visual and audible indication when the
filters are getting clogged. We'll also be using a TDS (total dissolved
solids) meter at the output of the pressure vessels. This is made by
Omega Instruments and will constantly monitor the salinity of the
product water. If the level exceeds the set limit (which is adjustable)
it sends a 12 vdc signal to illuminate a light on the control panel and
also activate two solenoids that will cause the product water to be
redirected overboard instead of into the tank. We'll also have a way of
back-flushing the membranes to increase their useful life.
This
is going to be a monstrous project, probably equal to the installation
of the diesel heater. The RO membranes and housings are 40" long which
is bigger than almost any space on the boat. Right now I'm planning to
install them and the pre-filters up in the chain locker. The high
pressure pump will be in a nearby compartment with the bow thruster.
The feed pump will be mounted in the bilge area beneath the forward
stateroom and the control panel will probably be mounted somewhere in
the forward head. With all the gear located forward in the boat any
noise from the system should be bearable if we're sitting out in the
cockpit or down below in the salon. Since the system should be
monitored while it's running we won't have it on while we're sleeping
(duh).
Right now (2-24-14) the plan is to begin collecting equipment and have this up and running by Summer 2014. I'll be updating this page as we go along so this may turn into a pretty extensive read. When it's completed, up and running I'll come back and edit to make this entry a little easier to get through.

.jpg) 03-26-14:
03-26-14:
I was able to get a good deal on a different pump from Hydra-cell. It's an M03 model pump rated at 3 gpm and 1200 psi that was used for test set-ups and has been refurbished by the factory. Haven't received it yet. I've put together a parts list and am waiting for prices from the folks supplying the pump. I put together a diagram (above) of how the system will go together. In the center-right of the diagram is a box labeled "Pressure Exchanger". This is a crucial part of the plan. It takes 800 psi water from the output of the pressure vessels and feeds it back to the high pressure pump. This way I can use a smaller motor to drive the pump, use less power and make the whole system more efficient. Pressure exchangers are commonly used in industrial RO systems but I'm still looking for one scaled down for my use. Spectra uses a version called the Clark Pump high pressure intensifier. This is basically a piston that pumps back and forth using the high pressure water to boost the low pressure higher. The one I'm looking for has only one moving part, a close tolerance ceramic drum, and uses the high pressure water to spin the drum to boost the low pressure water up to 800 psi. If I can't find this part then I'll skip the return line and build a basic system without it. In the diagram you can see pressure switches on the right side that will provide lights and alarms when the supply water pressure drops below a certain point. This will most likely be caused by the pre-filters getting plugged up but could also happen if the through-hull gets plugged by jelly fish or plastic bags or whatever. In most systems the high pressure pump requires this kind of protection but I'm adding it just to monitor the filters. The pump we're using can run dry and not be damaged. I've also decided to go with a different feed pump than the Blueline I mentioned above. The one I'll be using is an Iwaki aquarium pump. I heard a side-by-side running of these two pumps and the Iwaki was almost silent.
This is a major
component in our plan to sail and live independently, without having to
rely on external resources. Well, other than the occasional refueling
and maybe buying some food once in a while. We'll be able to make our
own clean water in really useable quantities. We'll have the sun and
the wind to make electricity and can fall back on using the genset if
necessary. We can catch our meals from the oceans. We'll be able to
get weather info and stay in contact from almost anywhere in the world
using a single side band radio. We'll even be able to repair our own
sails and canvas using our cool-man Sail Rite sewing machine. We'll
have almost every angle covered. The only thing I can think of that
we'll have to pull into port for.....I don't know how to make good rum.
Update 08-19-14:
The deal on the Hydra-cell pump never materialized and after three months of going around in circles with the guy I gave up and started looking for another way to do this. The pump and motor alone would cost me about $2200 new and this became a major sticking point for this project. I also had trouble finding an AC motor with the right specs. Then money got tight and our annual budget fell apart so I shelved this project, thinking I wouldn't get back to it until next Winter.
One weekend in August I was working on the mainsail preventer making measurements for some
backing plates. A friend on the dock stopped by and we started
talking. He told me about this guy he met the day before who was
preparing his boat for a trip to the Mediterranean next June. He was
stripping out a lot of gear that the previous owner had installed. I
heard something about a water maker that was being tossed. Excuse me? I
hustled over to this guys boat and started making a nuisance of
myself. I mentioned that I had designed my own water maker and was
looking for an AC motor to drive the high pressure pump. He looked at
me kinda sideways and said to follow him over to his shed. When we got
there he pulled open the door and pointed to a motor sitting on the
floor beneath a ton of other stuff. I got down there and looked over
the info plate. This was exactly what I needed and it looked like it
was in very good condition. I asked him how much he wanted for it and
he says "take it, it's yours". Cool! He then started pulling out all
kinds of stuff and before I knew it there was an entire water maker
system in a pile on the gravel. The guy said I should take the whole
thing because there might be more stuff in there that I could use. Uhm,
OK.

I loaded everything up and hauled
it back to our shed. I looked the water maker over and wrote down some
identifying info, part numbers and serial numbers. Back at the boat I
looked it up and found the system was made by Sea Recovery, model # SRC
600 AM. This thing makes 25 gallons per hour and draws 32 amps while
running. If I substituted the Iwaki fish tank pump for the feed pump in
the system it would drop the power requirements to about 25 amps which
is perfect for our situation. Cool!


This is not a new
water maker. Judging by the data plates it's somewhere between seven and ten years old. Just looking at it
though I can see that it's in very good condition and the dude told me
it ran fine when he had the boat surveyed three years ago. What I plan
to do is get a service kit and go through and rebuild everything in the
system. I think I'll dump the three proprietary membranes and replace
them with the ones I had planned to use in my original system, Filmtec
SW30-2540. These are available anywhere in the world and are fairly
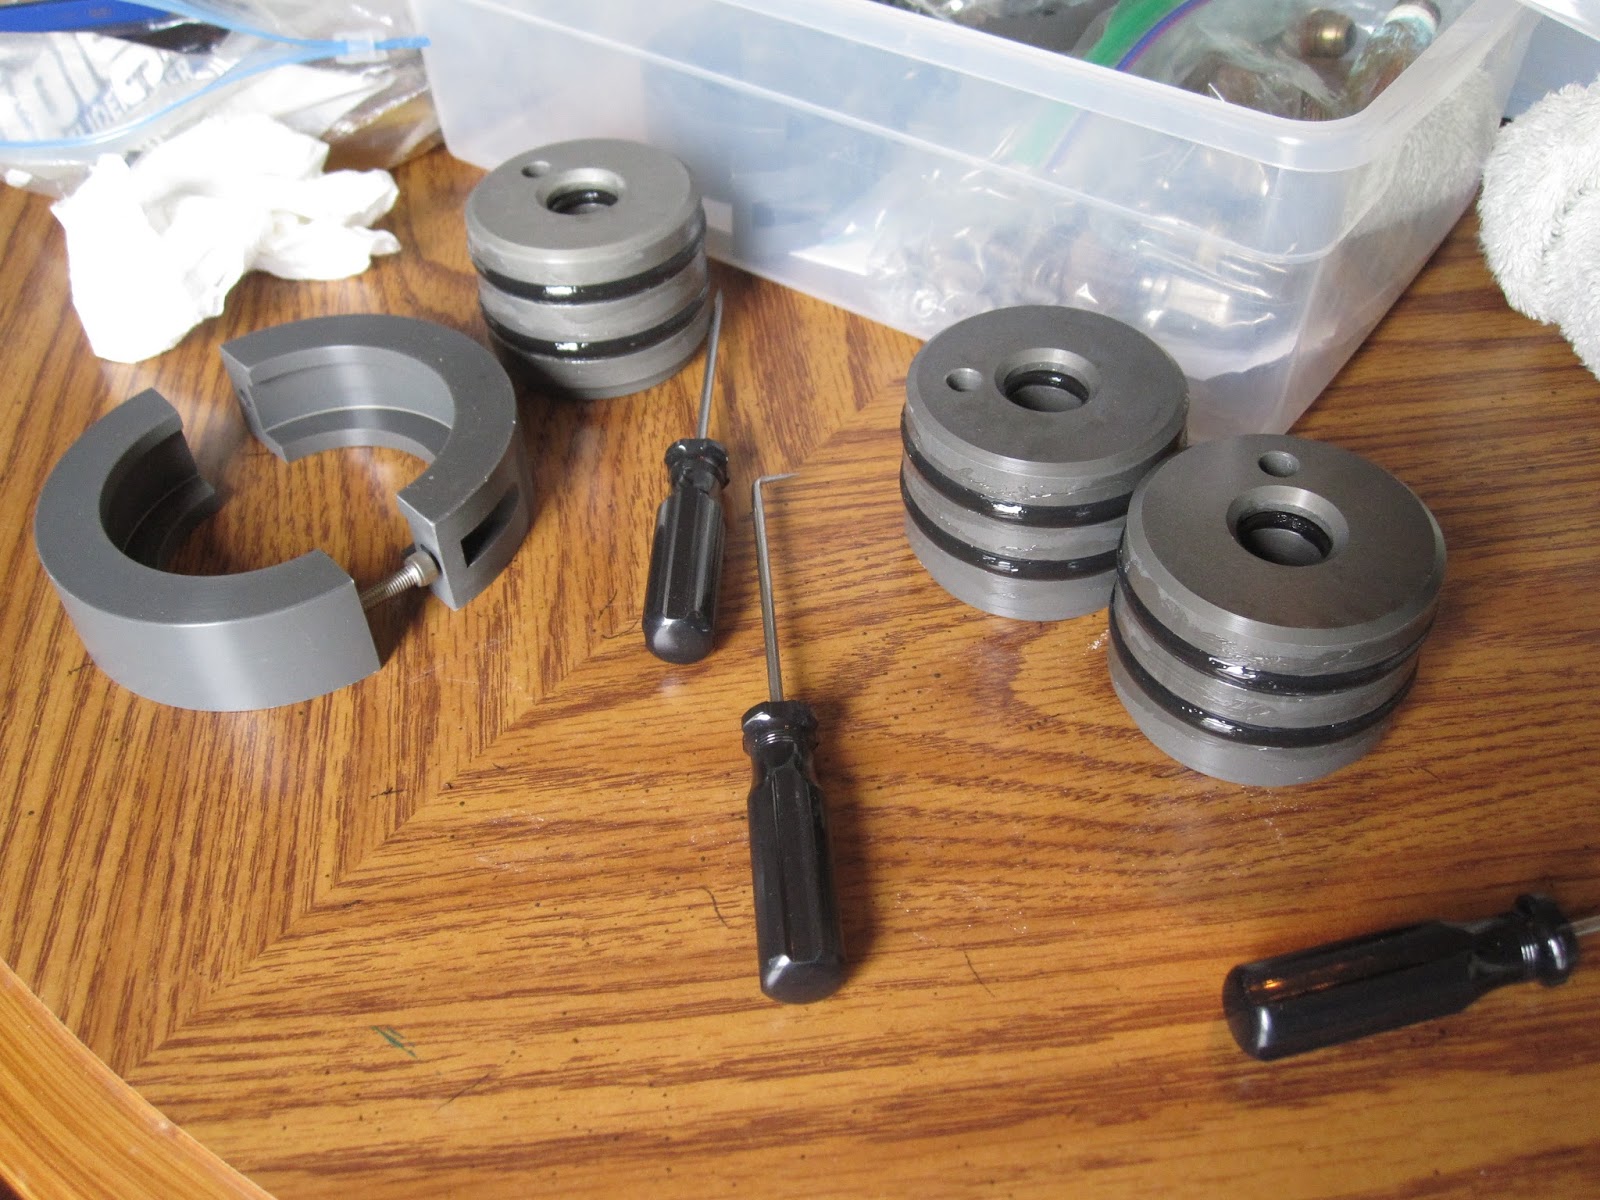
reasonably priced. The SRC came with pre-filters and housings and a bag
full of spares. These are the exact same filters I was going to use so
that's a bonus. The SRC control panel has two flow gauges, a flow
control valve and two pressure gauges. I had already bought some of
this stuff but these appear to be in good condition so maybe I'll clean
them up and hoard them for spares or sell them on eBay or something. It
has control relays for automatic operation. I was going to do a
similar set-up in my original system. There's nothing special about old
crusty relays though so I'll probably just replace these with new ones
for a fresh start. There's also a large, heavy, sealed box that serves
as the system controller. It has "on" and "off" buttons and a string of
LED's that I suppose are the TDS (total dissolved solids) display. I
already have a TDS controller that actuates relays for system control
that I was going to use in my original system. Mine has a nice digital
display and is something I'd really like to use. Maybe, just maybe, my
cool-man TDS controller can find a place in there. I may have to open
up this control box and see what makes it tick.
The
pile of parts also included valves, tubing for low pressure water and
some high pressure hoses. All the fittings are stainless steel and
everything looks to be in very good condition. There's even a UV sterilizer. Once I go through
everything, clean it up and replace seals and motor brushes I'll try
running it without the membranes in place. I don't want to use this
thing in the Chesapeake Bay because it's brackish water, diluted salt
water, and not what this system will be made for, not to mention the
fact that the algae would kill the system. I also don't want to run my
brand new membranes through crappy water and then have to pickle them
for six months. I'll just hook it up to verify that everything works
properly and have the water dump overboard, then flush it all out with
fresh water.
My original plan was going to cost about
$4,000. I think we'll now be able to put together a complete water
maker for about
$1200, the cost of two new membranes and housings. This would be for a
system that produces 40 gallons per hour. That's a lot of water for
just two people but I want a system that would quickly top off our water
tank and be done. Maybe run it once a week. Since this operates on AC
voltage it means we'll hafta run the genset when we want to make
water. By going with two 40" membranes instead of one we can make 40
gph and cut our power requirements in half as well as reduce the amount
of diesel fuel we burn. If we could keep the run time short and/or
reduce the system's power requirements just a bit more we could possibly
run this thing off the inverter and batteries alone. With solar and
wind power for back-up we could be very efficient. Green even. We'll
hafta see how this thing goes.
So now I'm officially onto Plan B for this thing. It's taken a whole new direction and should be a much easier process to put together. I'm now waiting for information on getting manuals and spare parts/rebuild kits from Sea Recovery. The local office here in Annapolis doesn't seem too excited about providing support for existing systems so I may have to find another source. More updates as they happen.